T28921, T29231: ZD interface
purpose
- T28921: DIGITAL flat bench cable replacement
- T29231: Retrofitting the Interface DIGITAL
qualification
Electricians
Material
| Pos. | Designation | article | number | |
| T28921 | T29231 | |||
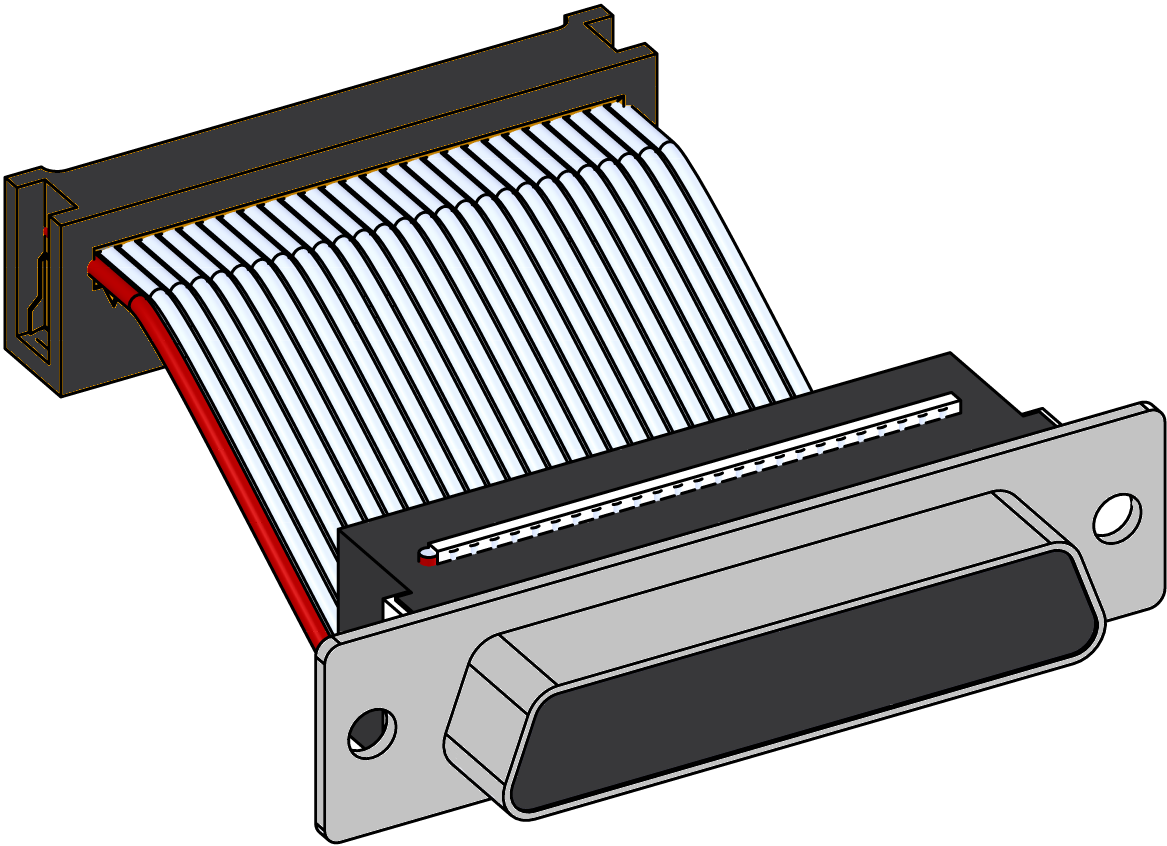
| 01 | 26-pin flat cable, Sub-D | T28921 | 1 | 1 |
| 02 | M3 locking block | T15697 | - | 2 |
| 03 | screw M3x8-Torx | B1983385 | - | 2 |
| 04 | Draht GNYE | L0709 | - | 1 |
| 05 | nameplate | T19277 | - | 2 |
Required material
- Torx screwdriver size 10
procedure
ATTENTION!
Working with the unit requires knowledge of the safety instructions and quick guide. That's why:
Read the safety instructions and quick guide carefully before starting any work. The basic requirement for safe work is compliance with all safety instructions and careful action by qualified qualified personnel to prevent accidents involving personal injury and property damage.
Remove covers
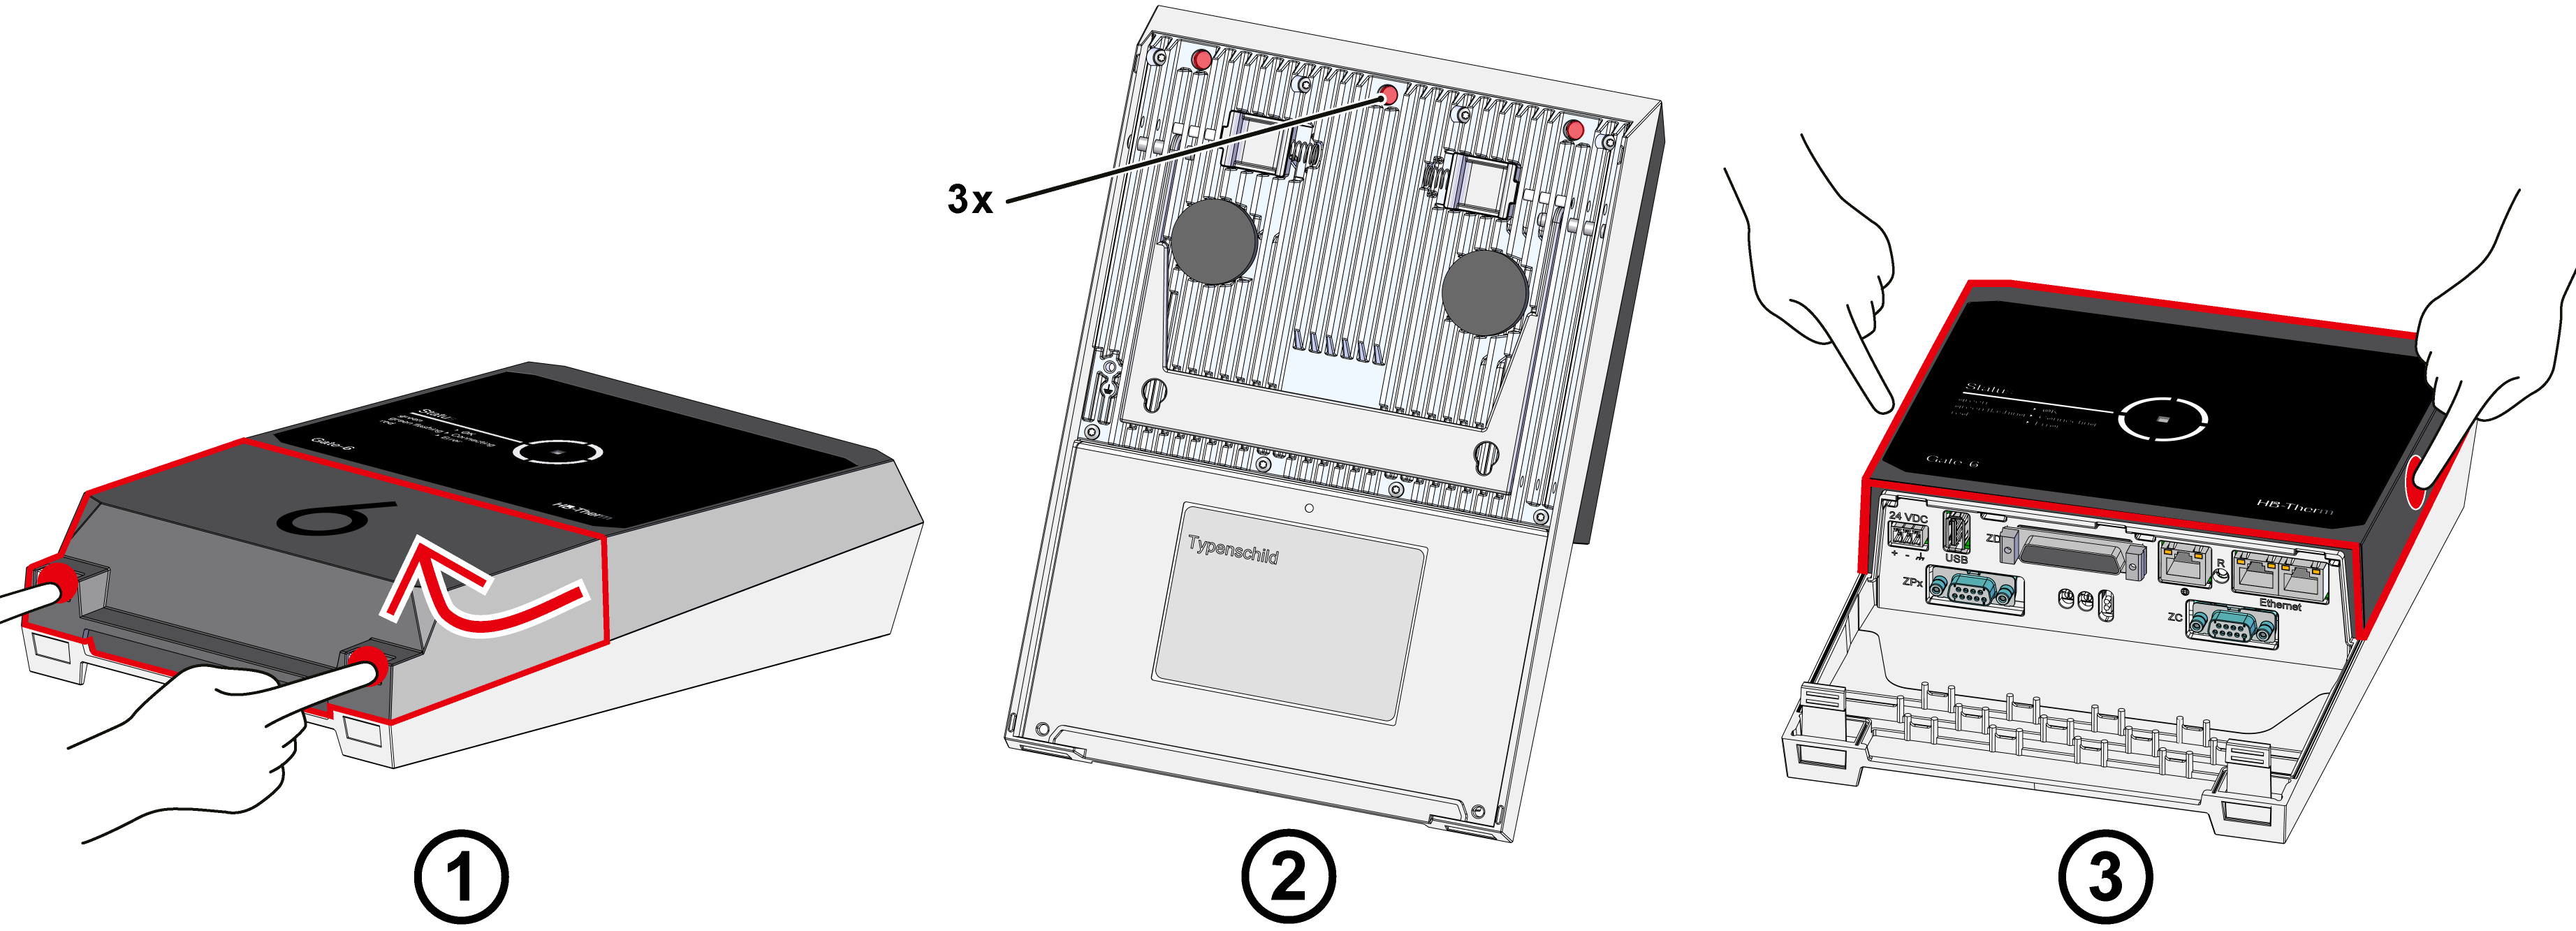
- Cable cover
- Hold down the fastening tabs and lift the cable cover upwards (Fig. → 1).
- Disconnecting connections on the Gate-6
- Disconnect all control cables and the power supply on the Gate-6.
- Housing cover
- Remove the fastening screws (3x) on the back of the Gate-6 (Fig. → 2)
- Press the housing cover together sideways until you hear a click (Fig. → 3). Then remove the cover.
Replacement/retrofit
- Remove the blind plug from the ZD opening. This is no longer required.
- Insert 26-pin flat cable with connector plug from outside into the opening (T28921).
- Secure the connector by placing the locking blocks on (T15697, B1983385).
- Also install the grounding cable (L0709) to the mounting screw of the connector.

- Also install the grounding cable (L0709) to the mounting screw of the connector.
- Connect connectors to the GAT-61 control system.
- 26-pin flat cable → slot X104
- Grounding cable → X150 slot
Install cover
- Put on the housing cover and press on from above and from the side until you hear a click.
- Attach the fixing screws to the back of the Gate-6.
- Stick the type plate (T19277) on the back of the Gate-6 and in the quick guide (O8406-X).
Check function
- Check communication via the interface in accordance with the procedure in the quick guide.
- Put on the cable cover and press down until you hear a click.