Download PDF
Download page T28645-X replacement filling pump.
T28645-X replacement filling pump

Qualification
Qualified personnel
Material
| Pos | Designation | Article | Number | |
|---|---|---|---|---|
| T28645-1 | T28645-2 | |||
| 01 | Filling pump 20 bar, 120 VAC | T28661 | 1 | 1 |
| 02 | Carrier for HB-100*ZL (assembled) | T28849 | 1 | - |
| 03 | Carrier for HB-140/160 (assembled) | T28648 | - | 1 |
| 04 | holding bag (assembled) | T28652 | 2 | 2 |
| 05 | threaded insert (assembled) | T21582 | 2 | 2 |
| 06 | M4x6 Torx screw (assembled) | B1983547 | 2 | 2 |
| 07 | Angled hose nozzle (assembled) | T28660 | 1 | 1 |
Required material
- Torx screwdriver size 20
- Slotted screwdriver
Procedure
ATTENTION!
Working with the unit requires knowledge of the safety instructions and quick guide. That's why:
Read the safety instructions and quick guide carefully before starting any work. The basic requirement for safe work is compliance with all safety instructions and careful action by qualified qualified personnel to prevent accidents involving personal injury and property damage.
Cool down and empty the unit
- On the basic screen, tap the function button (
 ).
). - On the basic screen, tap the function button (
 ).
).
→ The unit cools down and evacuation the mold before switching it off.
Check pressure and switch off unit
- Select [Display] > [Actual Values] > [System Pressure].
→ The system pressure must display 0.0 (±0.1) bar. - The pressure shown by the pressure gauge must be 0.0 (+0.3) bar.
- Switch off the main switch (QS 1), pull out the mains-connector.
- Remove covers from the unit (→ Open unit).
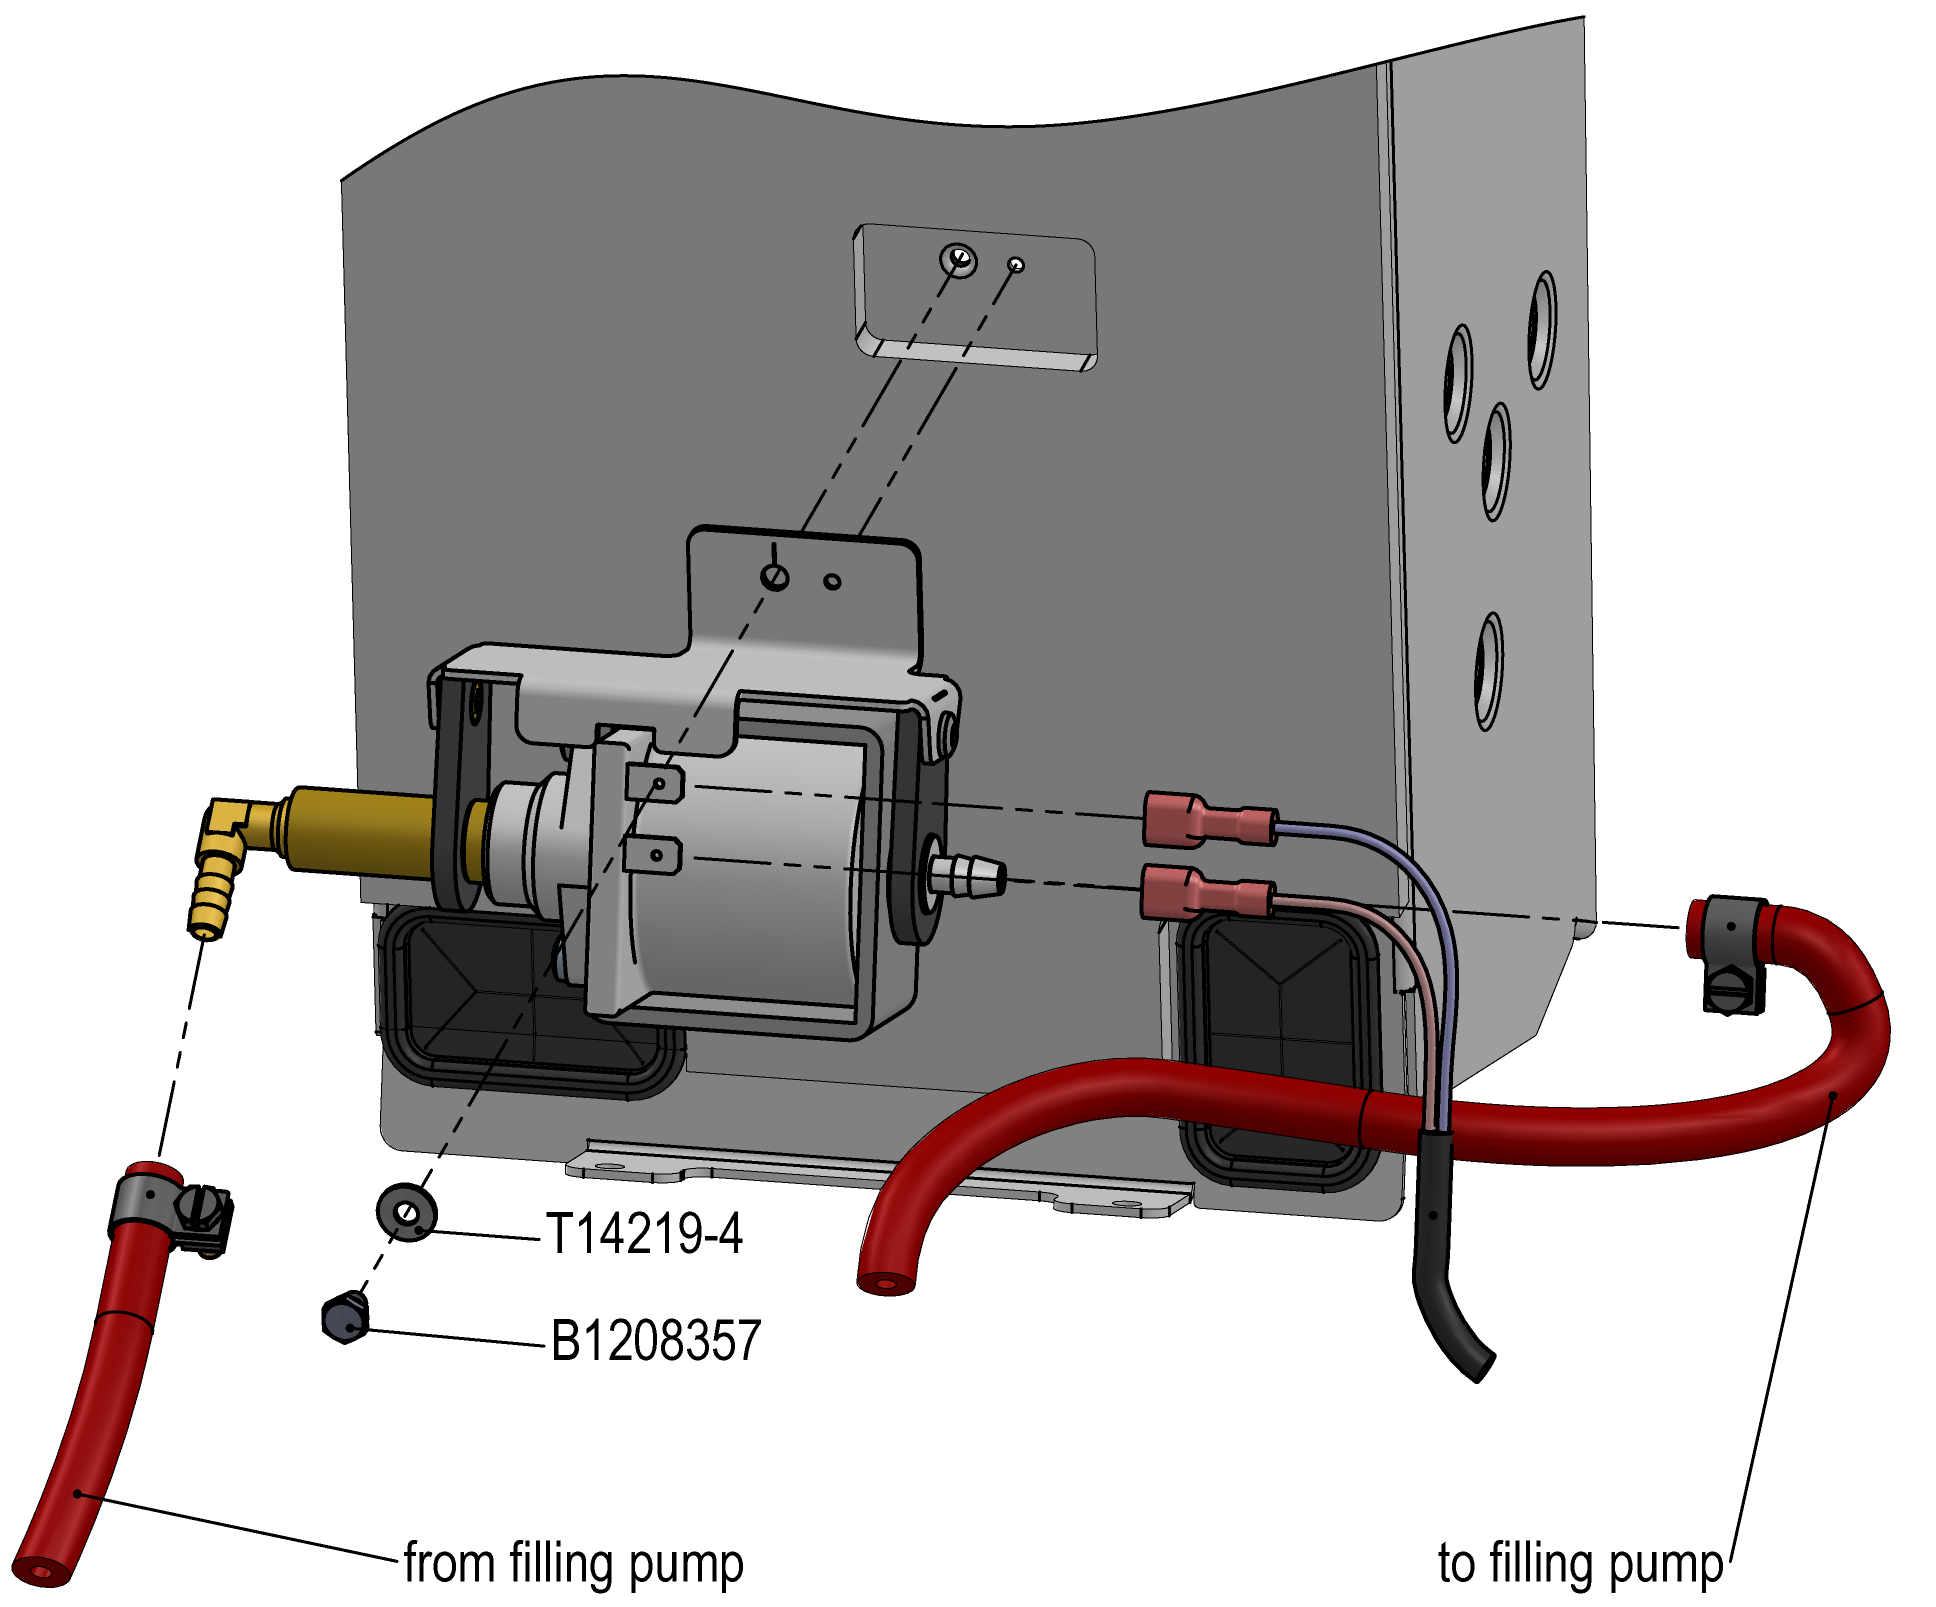
Replace filling pump
- Remove the mounting screw on the filling pump with bracket.
- Remove the connection cable from the filling pump.
- Release the hose clamps and remove the silicone hose lines from the filling pump.
NOTE!
Make sure that plugs and silicone hose lines are clean and free of contaminants. If necessary, replace damaged silicone hose (optionally available).
- Install silicone hose lines on the new filling pump.
- Connect the connection cable to the filling pump.
- Secure the filling pump with bracket to the appropriate position with the screw and washer.
HB-100Z61*ZL (T28645-1)

HB-140/160Z61 (T28645-2)
Check tightness and function
- Connect the mains-connector and switch on the main switch (QS 1).
-
Switch on the unit using the I/O button (
 ), check the tightness and function of the unit.
Switch off unit and install covers
-
Switch off the unit using the I/O button ().
→ The unit switches off and, if necessary, is cooled and depressurised. - Switch off the main switch (QS 1).
- Re-attach covers from the unit (→ Open unit).